
Overview:
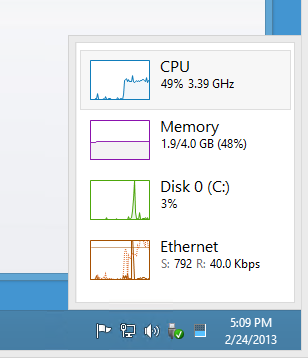
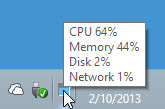
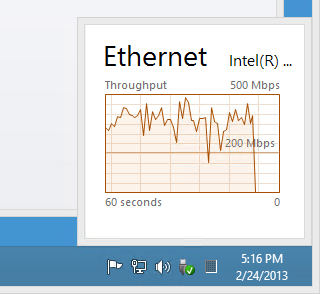
You can use Windows Task Manager as an effective CPU monitor left running in the system tray as a notification icon. It’s light on system resources, and safe to leave running full-time. Discreetly shows you how busy your system is, at-a-glance. Moving your mouse cursor over the icon provides a surprisingly handy pop-up view of CPU, Memory, Disk, and Network utilization, seen at right.
This article will walk you through the exact process of getting Task Manager to start with Windows, automatically. So even if you reboot, you can count on this little system tray icon being there for you. The amount of color in the grey rectangle indicates CPU load, at-a-glance. Always visible when working at your desktop. Easy to locate when you double-click it, say, when you wish to bring up the Task Manager application for quickly killing a misbehaving app, for example. Also avoids the need to remember the Ctrl+Shift+Esc keyboard shortcut. Do remember to minimize (not close) Task Manager after using it, so it’ll tuck itself right back down into your system tray, ready for the next time, without cluttering your taskbar.
This guide was developed with Windows 8’s greatly improved built-in Task Manager in mind, but you can get much of the same CPU monitoring functionality all the way back to Windows XP. I’ve been using this handy auto-start technique for a decade, on hundreds of physical and virtual Windows systems. Figured it’s about time I document it, step-by-step. So what better place to do so than right here on Dan Stolt’s IT Pro Guru Blog? Text, video, and screenshot versions of the same procedure all appear below. Simply pick your favorite, give it a shot, then let us know how it goes by commenting at the end. Enjoy!
Step-by-step text:
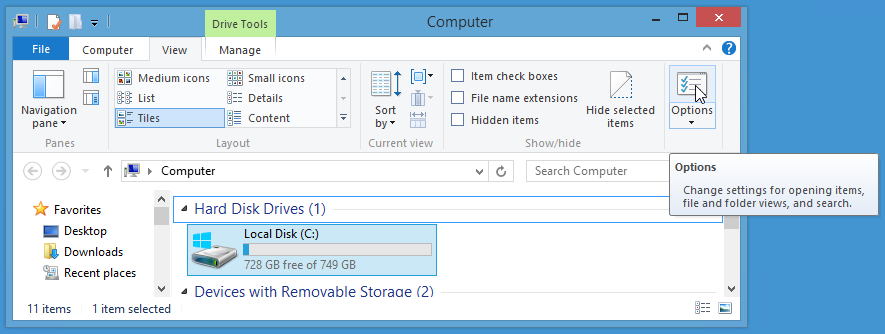
- Be sure file extensions are visible
- open ‘Windows Explorer’ using Win+E keys, click on ‘View’ menu, ‘Options’
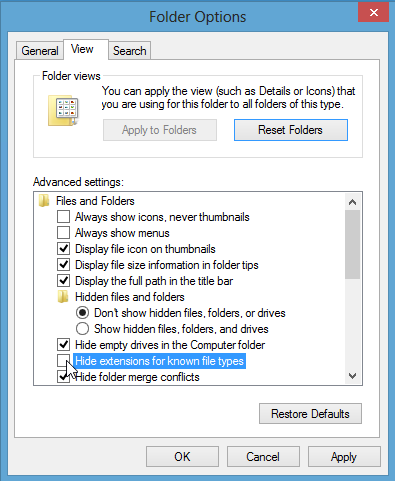
- click ‘View’ tab, uncheck ‘Hide extensions for known file types’, click ‘OK’ button
- Create a folder named C:command
- open ‘Windows Explorer’ by typing Win+E
- right-click on your ‘C:’ drive
- choose ‘New’, ‘Folder’
- type ‘command’ then press your ‘Enter’ key (without the quotes)
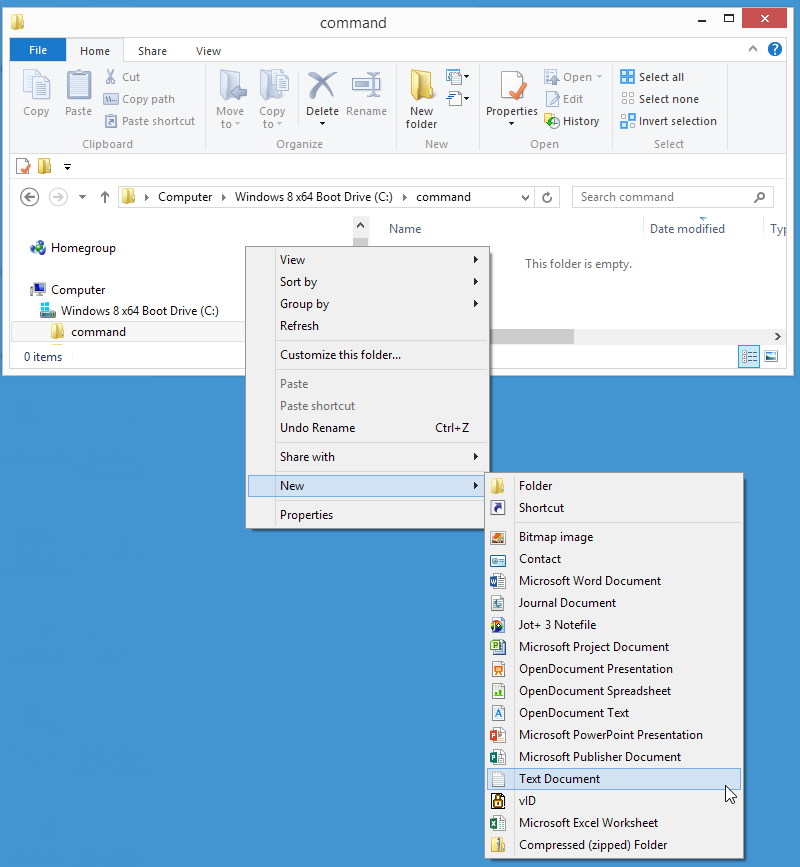
- Create a batch file called StartTaskManager.cmd
- left-single-click on the ‘command’ folder you just created
- right-click on the empty ‘command’ folder, choose ‘New’, ‘Text Document’
- type ‘StartTaskManager.cmd’ (without the quotes), then press your ‘Enter’ key
- when asked ‘Are you sure you want to change it?’ click the ‘Yes’ button to confirm
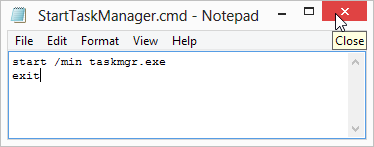
- copy the following 2 lines of text into your clipboard by highlighting, then Ctrl+C
start /min taskmgr.exe
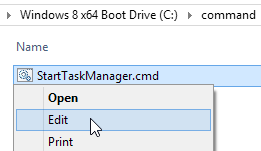
exit - right-click on ‘StartTaskManager.cmd’, choose Edit
- paste the contents of your clipboard into your plain text editor by typing Ctrl+V
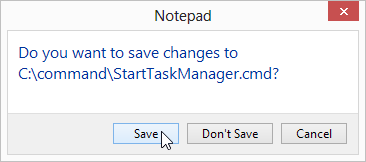
- close your plain text editor, which by default for most systems is Notepad
- when prompted about wanting to save changes, click the ‘Save’ button
- Create a shortcut and edit its properties to start minimized, making it more discreet at startup
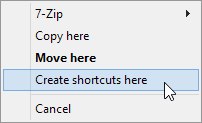
- right-click and hold ‘StartTaskManager.cmd’ to drag it to your Desktop
- let go of mouse button
- a menu pops up, choose ‘Create shortcuts here’
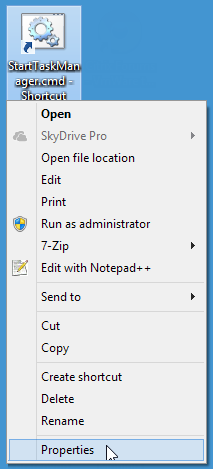
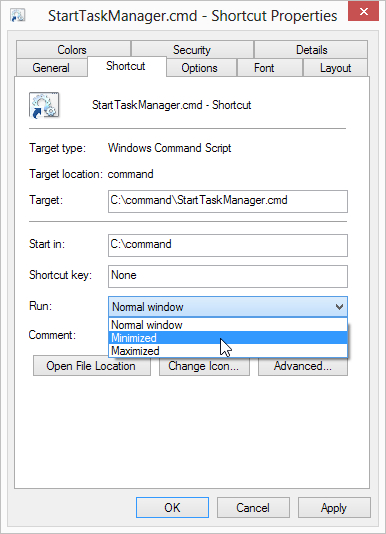
- right-click on the new shortcut, select ‘Properties’
- in the Run option drop down menu, choose ‘Minimized’, then click the ‘OK’ button
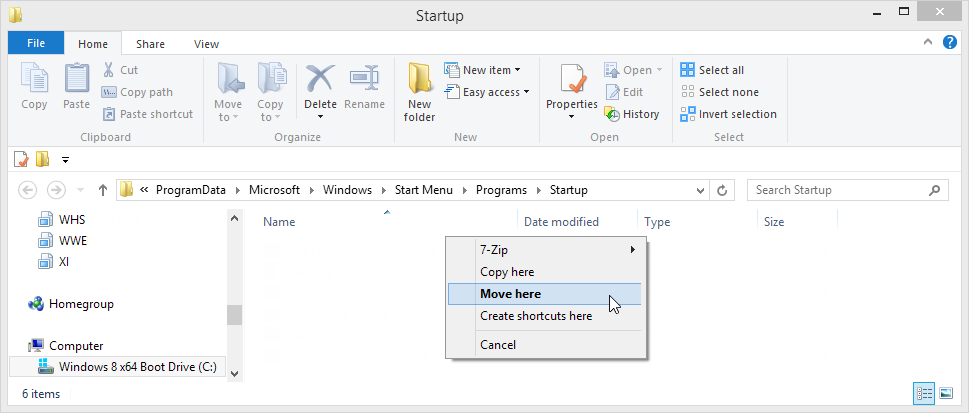
- Move this customized shortcut to your Startup folder
- copy the following 1 line of text into your clipboard by highlighting, then Ctrl+C
Shell:Common Startup - press ‘Win+R’ to bring up the Run dialogue
- press ‘Ctrl+V’ then press your ‘Enter’ key, which opens your ‘Startup’ folder, the special folder where everything in it is automatically launched shortly after you reboot, login, and begin to see your desktop
- right-click and hold ‘StartTaskManager.cmd’ to drag it to your ‘Startup’ folder, choose ‘Move here’
- copy the following 1 line of text into your clipboard by highlighting, then Ctrl+C
- Tweak Task Manager settings to your liking
- double-click ‘StartTaskManager.cmd – Shortcut’ in your Startup folder, which starts ‘Task Manager’
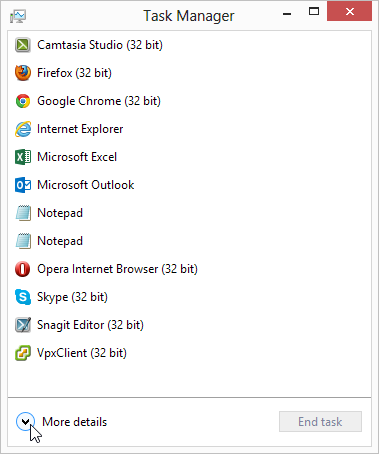
- double-click ‘Task Manager’ in your system tray, which is the right-most section of your taskbar, near the click
- click ‘More details’
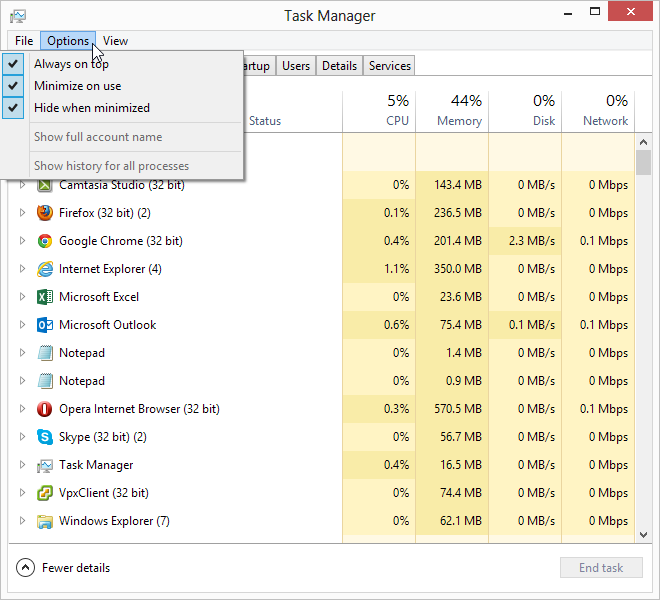
- click ‘Options’ then turn on all 3 checkboxes for ‘Always on top’, ‘Minimize on use’, and ‘Hide when minimized’
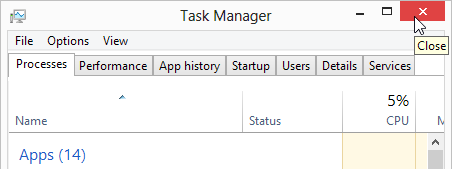
- close ‘Task Manager’ to save the ‘Options’ you just configured
- note that the ‘Options’ you just configured in ‘Task Manager’ aren’t always saved, sometimes disappearing after reboot
- double-click ‘StartTaskManager.cmd – Shortcut’ in your ‘Startup’ folder again, it should appear in your system tray, but if it doesn’t, step 6 below will fix that
- close the Startup folder
- Customize system tray to ensure the small Task Manager is visible at all time
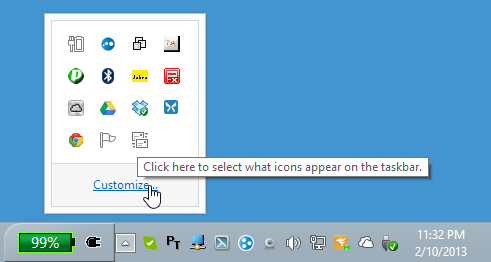
- click the ‘Show hidden icons’ up arrow in the system tray, choose ‘Customize…’
- in the ‘Notifications Area Icons’ menu, locate ‘Task Manager’
- choose the ‘Show icon and notifications’ drop-down menu selection, then click the ‘OK’ button
- left-click then drag the ‘Task Manager’ icon over to the right, next to your clock, so your eyeballs will always know exactly where to look
- next time you reboot, you’ll see ‘Task Manager’ automatically launches
- when rebooting and first logging in to get to your desktop, ‘Task Manager’ shows up in both the taskbar and system tray, just click the larger taskbar icon twice, and it’ll then disappear from the taskbar, remaining only in the system tray, as it intended
Step-by-step* HD video:
Step-by-step screenshots:
each image has explanatory captions below


Press Win+R, press Del to remove whatever is there, then paste in the following one line and press enter:
Shell:Common Startup
![]()
Known issues:
- After a reboot, Task Manager appears in both the taskbar and system tray, despite the chosen ‘Hide when minimized’ option. The workaround is simple, just left-click on the taskbar icon twice, and poof, it’ll disappear from the taskbar. But it’d be nicer to automate this. My attempts at adding ‘start /min’ and ‘start /max’ to the script seem to fail to get around this.*
- The ‘Options’ you configured in ‘Task Manager’ aren’t always saved, sometimes forgetting your preferences after a reboot, for example.
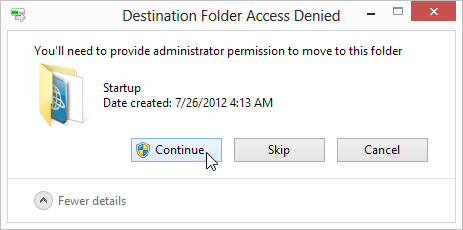
- Administrative rights are required.
- For unknown reasons, after weeks of working fine, Task Manager’s ‘View’, ‘Update Speed’ spontaneously gets into ‘Paused’ state, stuck at a false maximum CPU busy indication. Workaround is to change back to ‘Normal’, then live monitoring immediately resumes.
Future improvement ideas:
- Find a workaround for “Known issue” #1, outlined above.
- Due to habit, it’s common to accidentally close Task Manager when using it rather than merely minimizing it. This means you lose the system tray icon until the next time you launch Task Manager. Perhaps Powershell and Task Scheduler are methods I’ll explore, read more here.
- Some advanced users looking to squeeze every last bit of performance from their system may wish to tweak Task Manager’s ‘View’ menu, choosing ‘Update speed’, ‘Low’ to reduce impact on system performance. Unfortunately, this setting can also be lost, due to known issue #2 above.
- For the recommended ‘Notifications area’ tweak I demonstrate, I’ve discovered that you can also just drag and drop Task Manager straight from the list of icons seen here, to the bottom-right of the system tray.
- Make setting this up faster and easier.
Change log:
- Feb 24 2013*: Added prerequisite first step to the written and screenshot instructions, making sure ‘Hide extensions for known file types’ is unchecked. If this step is skipped, the batch file will be created with the wrong file type/won’t run. In the video, file extensions were already set to visible, prior to the production of the recording. Also added 2 more collapsed views that enthusiasts might appreciate.
- Mar 05 2013: You might also appreciate these related lifehacker articles:
Windows In-Depth, Part 4: The Revamped, Vastly Improved Task Manager, Whitson Gordon, SEP 22, 2011
How to Customize the Windows 8 Task Manager, Whitson Gordon, MAR 5, 2013 - Jan 28 2016: Everything still works exactly the same way in Windows 10, even the known issues are still there.
Wondering why your Task Manager settings sometimes vaporize mysteriously? Wonder no more, here’s why, along with a somewhat zany but very effective fix, by Roubo on Dec. 13 2015:
Task Manager doesn’t save settings if Windows 8.1 (or 8.1RT) shuts down unexpectedly
If your auto-start is unreliable, see also Dan’s fix, in the comments below. Here’s a copy:
Dan Stolts ITProGuru on March 20, 2014 at 10:34 am said:
Great article Paul, thanks so much…
I moved the shortcut into the startup folder, modified the shortcut properties (in the startup folder) to put the “c:command” folder in the “Start In” field and changed the Target to “C:CommandStartTaskManager.cmd” then changed the Run: to “Minimized” the task manager appears to reliably start minimized.
Thanks a bunch
See also ITProGuru guest-author Paul Braren‘s blog at:
TinkerTry IT @ home
Efficient virtualization, storage, backup, and more…
Here’s a sample of some of his Windows related Productivity tips:
- Using Task Manager and Resource Monitor to figure out what’s going behind the scenes in Windows Server 2012 / Windows 8
- Outlook 2013: Create an “Inbox All” button to view ALL of your inboxes at once
- Windows 8 Tip for easily handling an accidental drag-and-drop of an application behind the Taskbar
- All TinkerTry articles featuring Productivity Tips
- All TinkerTry.com articles featuring Hyper-V
- VMware ESXi 5.1 can run Microsoft Hyper-V Server 2012 VMs, nice!
Additional References:
The Windows 8 Task Manager by Steven Sinofsky Oct. 13 2011
Run the Task Manager on startup. How? by lefreeman on Aug. 26 2012
How to Customize the Windows 8 Task Manager by Whitson Gordon Mar. 5 2013
Windows In-Depth, Part 4: The Revamped, Vastly Improved Task Manager, by Witson Gordon Sep. 22 2011
Comments
3 responses to “Windows Task Manager auto-started as an effective CPU monitor in your system tray”
I really appreciate this walk through. I have been adding the task manager in the system tray since Windows XP and was not able to auto start it in Windows 8 until I found your blog. Thank you very very much!!
I’m so glad you liked it, and good to note that it still seems to work just fine under Windows 8.1 too!
Great article Paul, thanks so much…
I moved the shortcut into the startup folder, modified the shortcut properties (in the startup folder) to put the “c:command” folder in the “Start In” field and changed the Target to “C:CommandStartTaskManager.cmd” then changed the Run: to “Minimized” the task manager appears to reliably start minimized.
Thanks a bunch