Insert Windows Server 2016 DVD and boot your computer from the DVD. If you do not have the media, you will need to download. See https://www.microsoft.com/en-us/evalcenter/evaluate-windows-server-technical-preview for the Technical Preview. You could also download from MSDN.MICROSOFT.COM or other subscription service. You may also opt to create a bootable USB drive to use as an ISO. You can get step by step instructions from http://itproguru-app.azurewebsites.net/expert/2016/05/create-bootable-windows-server-2016-usb-thumb-drive-for-installing-os/
Video Coming Soon…
Step-By-Step…
- Windows Server 2016 Technical Preview 5
- Install Now
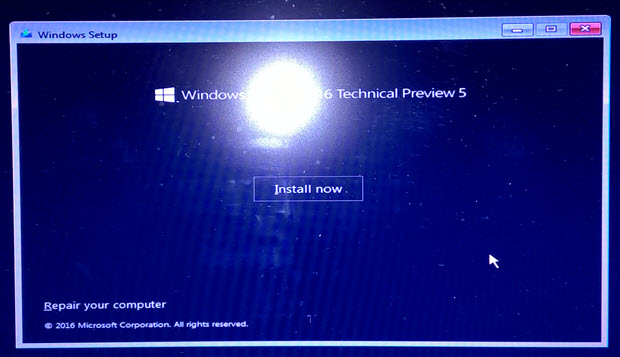
Note: the “Repair your computer” linkClick the Install now Button
- Activate
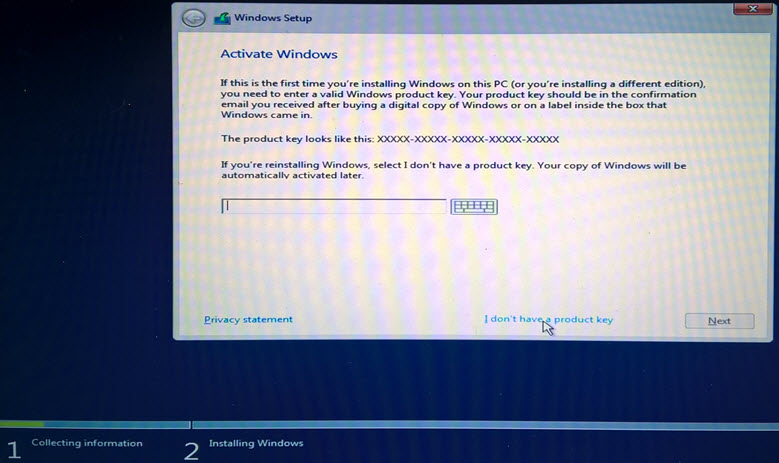 Optionally, enter your product key then Next or click I don’t have a product key
 - Accept Terms of Use
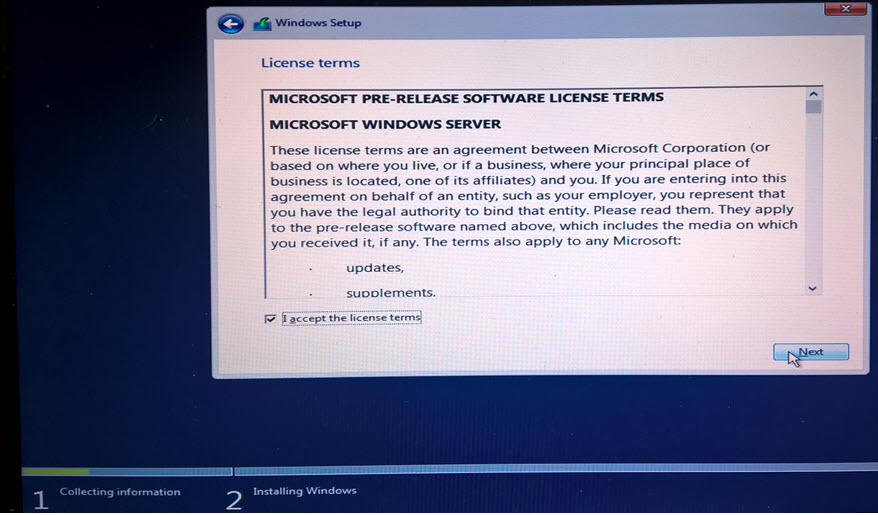 READ the license terms. Click on I accept the license terms then Click the Next button.
 - Custom Install
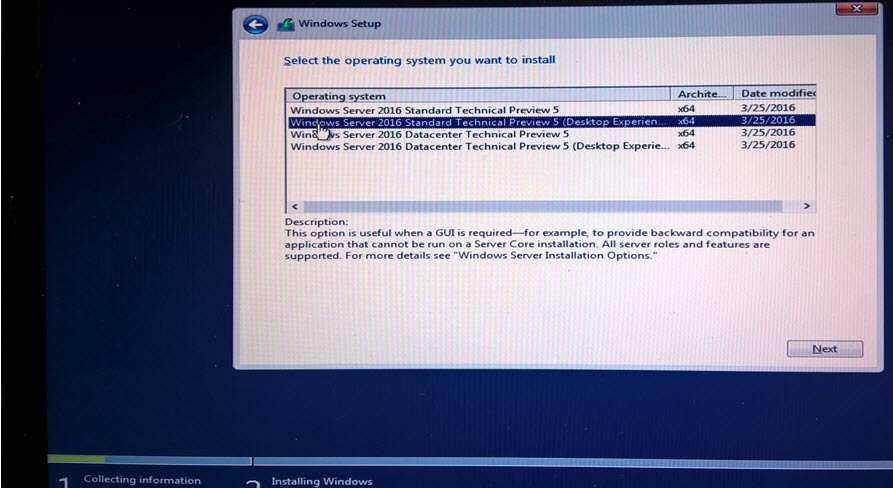
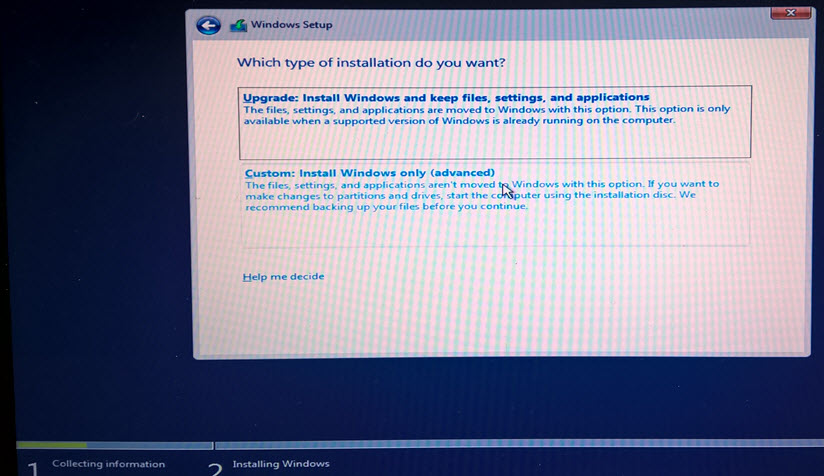 The Evaluation DVD may have more options than TechNet/MSDN DVD. Make sure you choose “Windows Server 2016 Standard/or/Datacenter (Desktop Experience).
NOTE: DEFAULTS TO “Server core Installation” (no Desktop Experience) Click the Next Button - Select OS
 The Evaluation DVD may have more options than TechNet/MSDN DVD.
Make sure you choose Windows Server 2016 Standard/or/Datacenter (Desktop Experience)NOTE: DEFAULTS TO “Server core Installation” (no Desktop Experience)Click the Next Button - Where? Install Dual Boot to VHD; Create new VHD drive and partition [Skip to next step if installing on bare metal]
 If you want to install into a VHD follow this step/process. You can CREATE a VHD to install (instead of installing on metal)
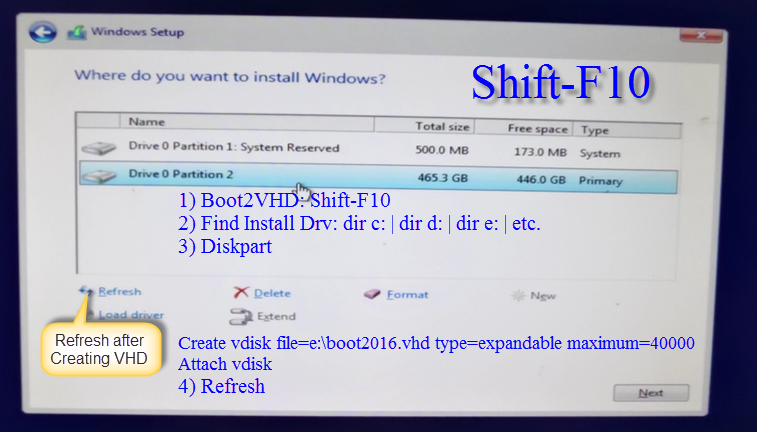
Notice: if using dual boot from an older version of windows (Windows 7/8/10) this procedure will upgrade your boot loader to Windows Server 2012 so the boot menu will be Windows 2016 instead of Windows 7/8/10. Also, the Windows 2016 will be the default. You can change the default later using the msconfig utility. See attached video for instructions.On the Where Do you want to Install page press Shift-F10 to open a command prompt.
SHIFT-F10 {to open a command prompt window }
Find installation drive (dir c:, dir d:, dir e:, etc)
Create Folder if you like (eg. md BootVHD) {use full path in Create vdisk below}{ open the Disk Partition Utility (replace e: below with the proper drive letter for your system. see Video at itproguru.com/2016vhd for video walk-through}
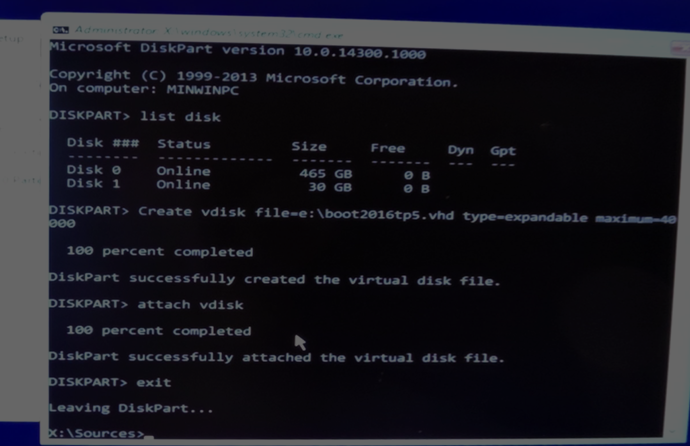
Diskpart
Create vdisk file=e:BootDemo.vhd type=expandable maximum=40000
Attach vdisk
Exit
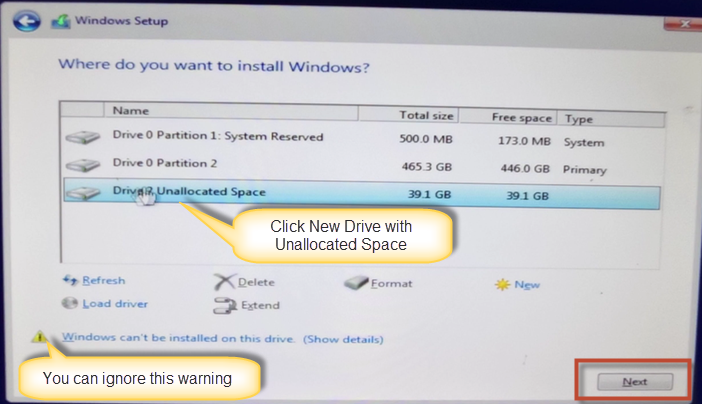
Then Refresh on the Windows Setup Screen
Select the New VHD Partition then for the install and click NextTo see a video: https://aka.ms/Boot2VHD
Note: Feel free to change the name and path of the .VHD file in the create vdisk statement above.
- Where? Delete Existing Partitions [URGENT NOTICE: SKIP THIS STEP If not WIPING your primary drive during install]
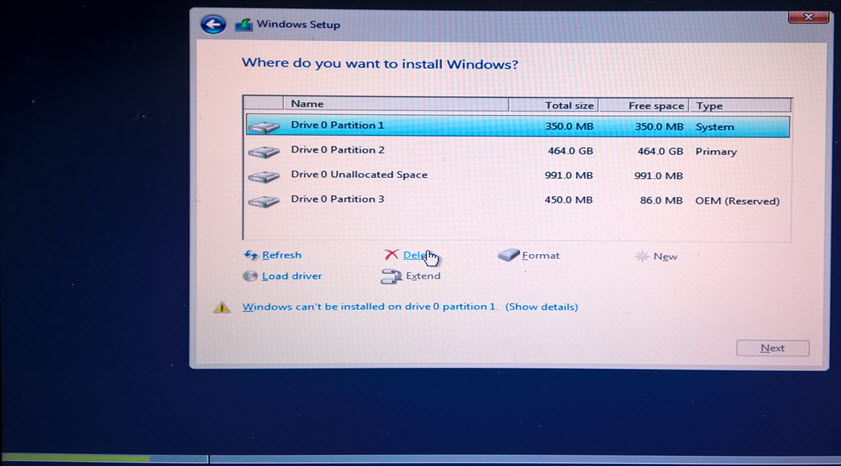 ** NOTICE ** the following steps WILL wipe out all data on your primary drive. These instructions are for a CLEAN bare metal install. If you do not want to wipe your drive, cancel the install and follow instructions above for Boot to VHD
You should also remove any secondary or external drives to prevent accedental deletion of data.
Click each of the listed Drive 0 drives then click the delete button. Im prompted that “this partition might contain important files or applications from your computer manufacturer. if you delete this partition, any data stored on it will be lost” If you are sure you want to wipe this drive, click OK. - Where? New Partition, do the install [Skip this step if doing Boot To VHD]
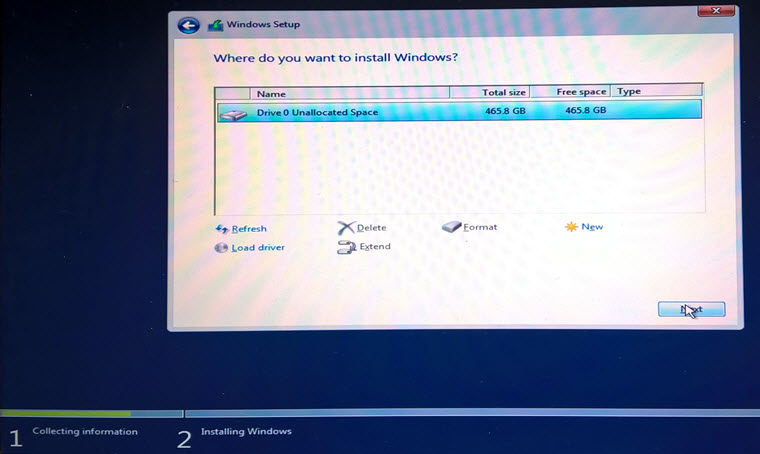 Click Drive 0 Unallocated Space then click Next
 - Install Underway
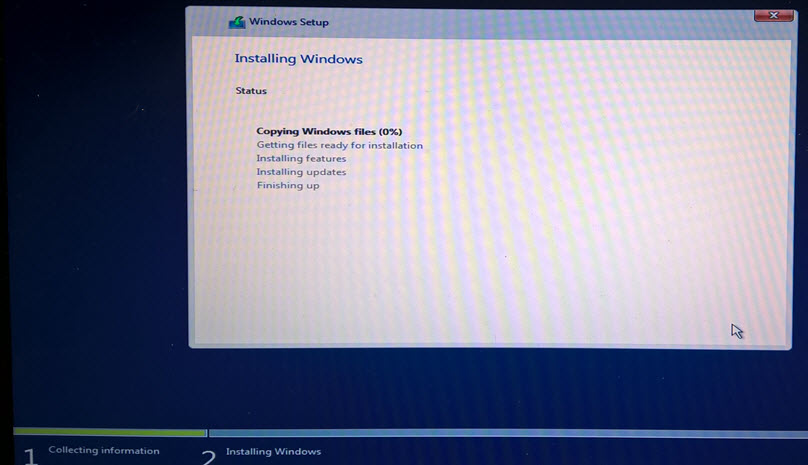 Give it some time to finish…
The system will automatically reboot when finished. If you walk away, you may have to remove the USB or DVD and reboot so it boots to the hard drive instead of the installation media. - Set Administrator Password
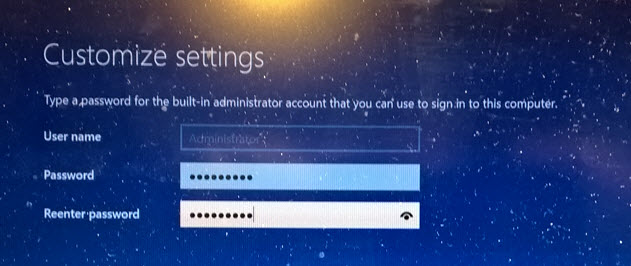 Enter a password for the administrator account into the password adn Reenter password fields then click Finish
 - Lock Screen
 Press [CTRL-ALT-DEL] to bring up the login screen
 - Login
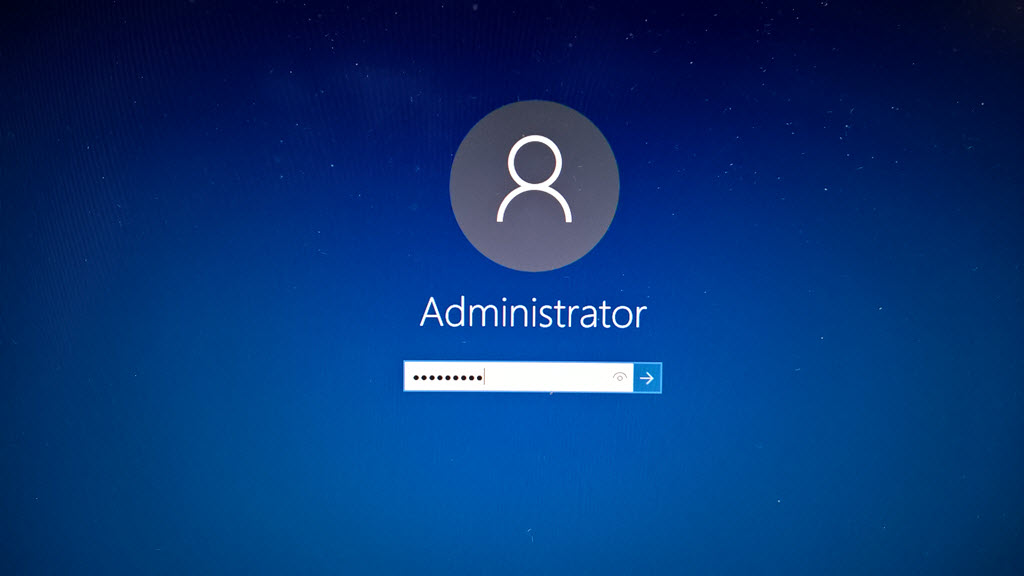
type in your password and press [ENTER] to loginif you are on a wired network, you will be asked Do you want to allow your PC to be discoverable by other PCs and devices on this network? If you are on a priviate network you should select Yes.
Notice server manager is automatically opened for you.
In the video we also cover creating a new administrator user
- [Optional:] Change default boot order
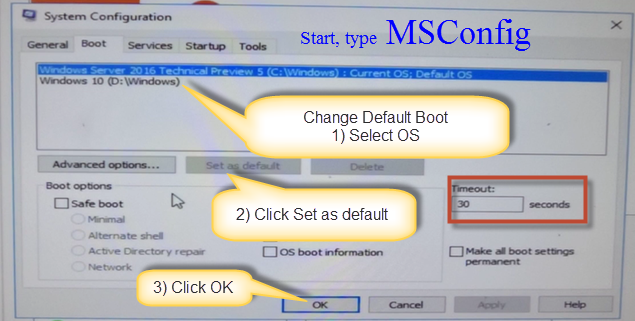 Click Start, type msconfig
Click “System Configuration”
Click the boot you want to be the default
click Set as default button
Click OK
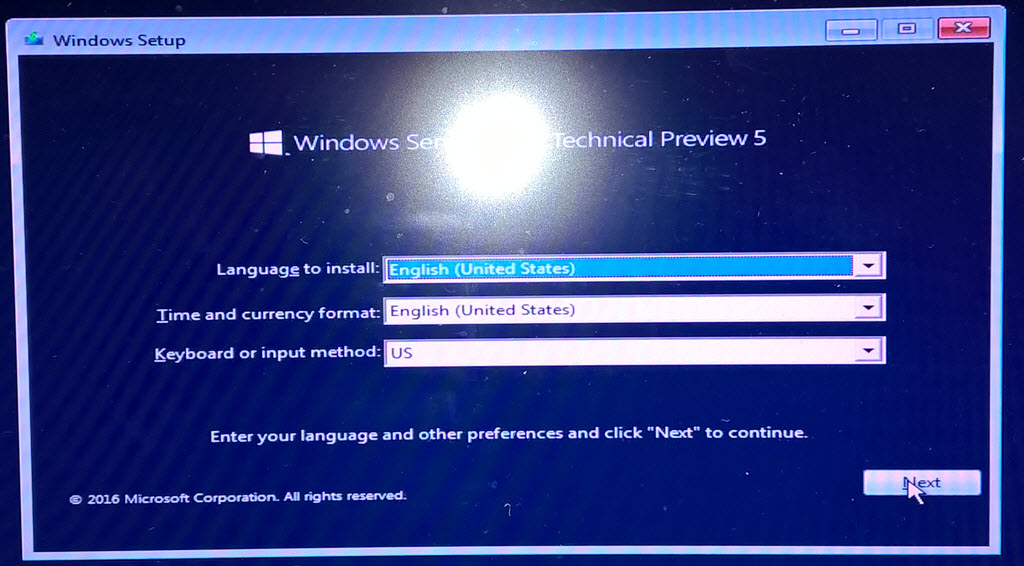
Click the Next Button
In the video we also cover creating a new administrator user